Blog Photography Tips
So I’ve been thinking about writing this post for a while and I thought now would be a good time. I started my blog three years ago today, and as it’s January I’m sure a lot of you will be starting blogs too. If not, you should, they’re fab!
~ Very long post alert! ~
Now I am by no means a professional photographer. In fact I have no training at all, I wanted to study it at school but it wasn’t on offer so that idea went out the window. My mum used to be really into it and was always taking courses so I’ve always loved it, but just as a hobby. I’ve been taking photos of everything since my teenage days and a good photo is something that pleases me immensely.
I thought it might be a nice idea to share some of my tips on taking photos for your beauty blog. There’s no set way to blog and I actually think it’s important to have your own style, so don’t take this as a ‘rule book’ type post, it’s merely some food for thought and to give you a nudge in the right direction. Anyway, enough of that, let’s get started.
Equipment
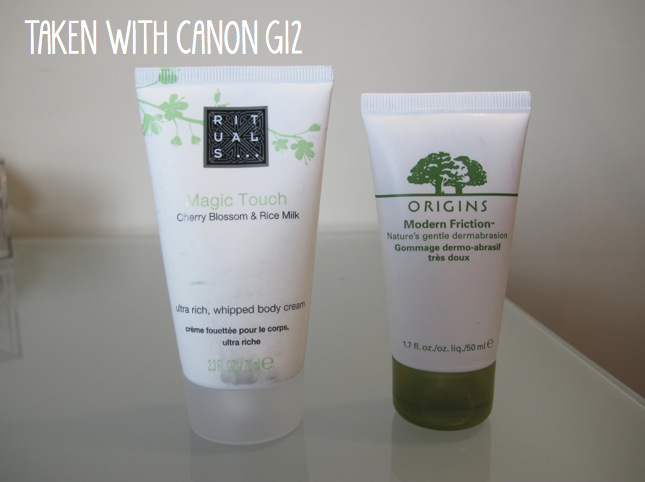
I posted my camera journey here where you can see the little digital camera I started off with. After using that for a while I moved onto a Canon G12 and I now use a DSLR Canon 600d. The main reason I moved onto a DSLR was because I wanted to start experimenting with lenses and I wanted to start filming videos for YouTube. I actually think the Canon G12 is a great camera for blogging and although you won’t get the nice depth of field you’d get with a DSLR, it does pretty much everything else you’d need. I actually think you can get just as nice a photo with it if you work on the photo composition and lighting.
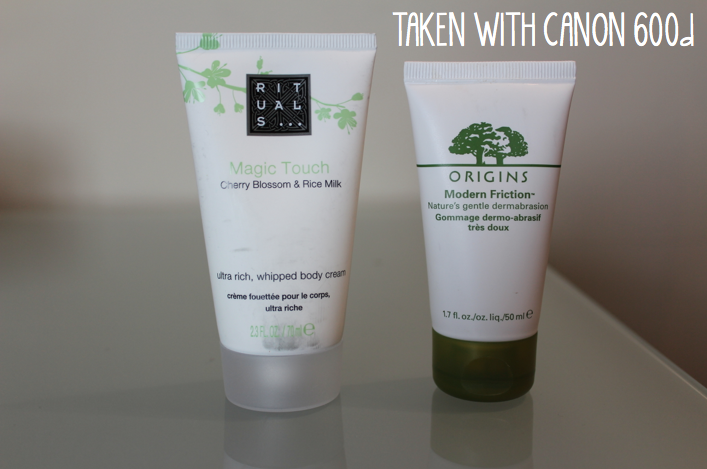
As I said, I use the Canon 600d now and I have the kit lens and the Canon 50mm lens (which I use for my ‘Whats On My Face’ photos and outfit photos). I also bought a remote control which was one of the best things I ever bought. I use it mainly for videos, but it’s also so good for photos I’m taking of myself because I can take my time and not get stressed running back and forth (yes, I used to do that!).
Lighting
I think lighting is the most important factor in taking a nice photo. Once you’ve figured the whole lighting thing out, photography in general is so much easier and enjoyable. The main mistake that can be made is taking photos into the light. This applies to not just product photos, but photos of people on holiday or outfit photos when the sun is shining. If you take a photo with the sun behind the subject, the subject will be shaded and won’t be the clear focus of the photo. You always (unless you want that sun glare effect) get a better result when the sun is behind the camera and infront of the subject (although try to avoid any squinty face in the sun photos).
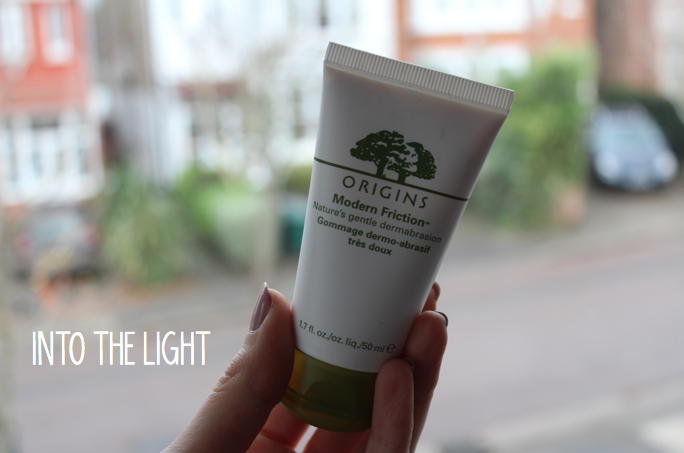
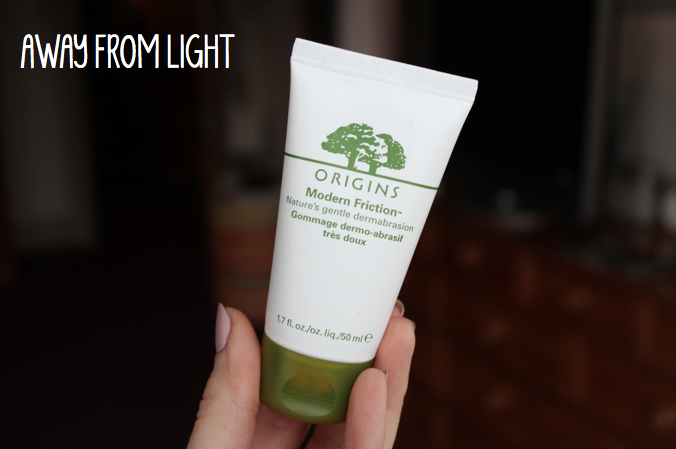
Now onto the dreaded subject of flash. I personally hate using the flash. I never, ever use it unless I’m in the dark, on a night out, in a dark club or outside at night and it’s essential. I think the flash is really unattractive on people and I think it makes objects appear flat. Saying that, in the professional photography world when used properly it can be great, but we’re talking blogging here not the red carpet. I like natural lighting the best, but you do have to make sure it’s good enough to show the details of the photo well. Take photos near a window and you should get a bright, but warm photo. I do own a studio light, but I mainly use it for filming videos so I can do it even when the ‘sun’ has gone.
You can play around with your lighting at home to get the desired effect, for example some of your lamps or ceiling lights might be more yellow than others. You can also buy ‘daylight bulbs’ from most art stores which are helpful when taking product photos as they’ll help show the true colour of the product. The loft of my house has a sky light, so I sit under that to take photos of swatches.
One more thing about lighting, be careful not to catch your shadow in photos… that’s not cool.
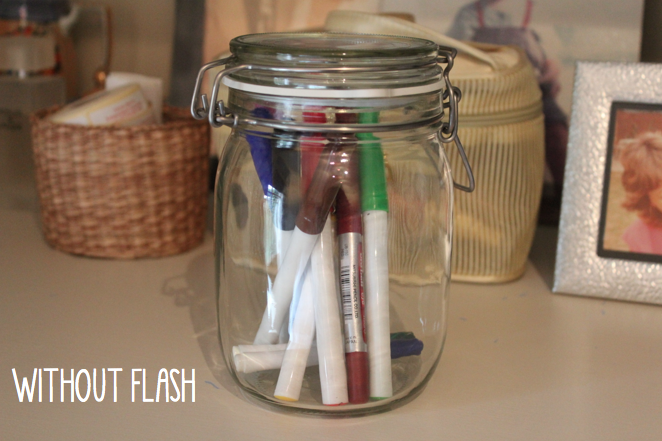
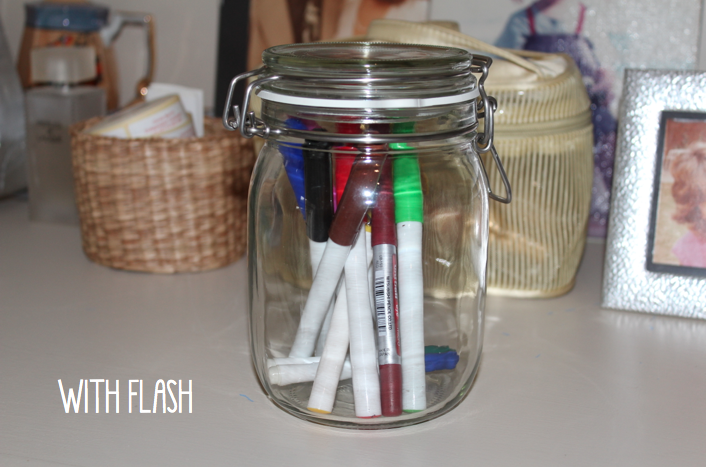
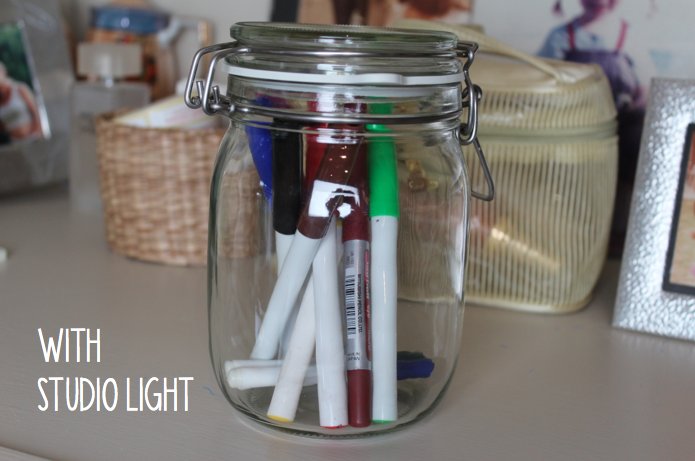
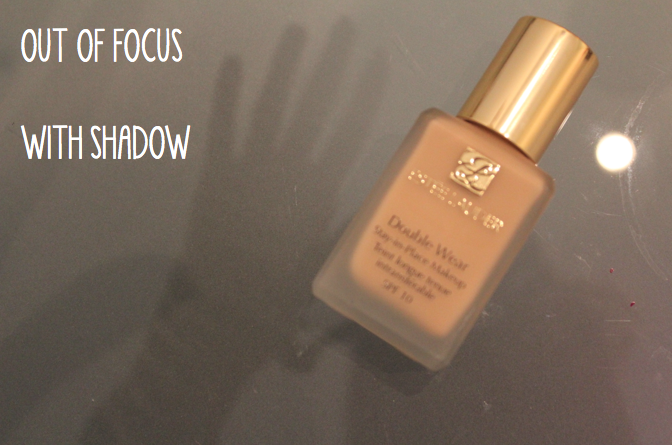
Photo Composition
The photo above talks about focus… we’ll come onto that in a minute.
The first thing I’d suggest is to think about what style you want your photos to be in. Everyone has a different style of taking their blog photos and I think that’s really nice. It shows you and your blog’s personality and your photos become recognisable to your readers. You guys know my style by now, I’m sure!
For example, Milk Bubble Tea has very soft and pretty photos, Pearls & Poodles has very clear, crisp photos with a white background. Hello October has warm photos full to the edges and Gemsmaquillage often works with depth of field (making the background blurry).
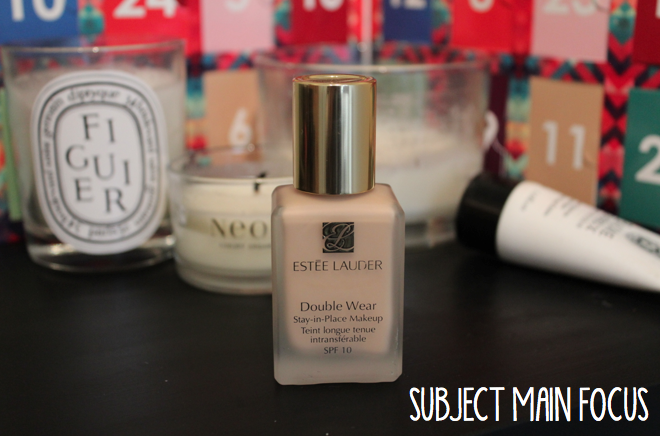
It’s important to make your subject the main focus of the photo. You obviously have to make sure the subject is actually in focus, but also the positioning of the product is important when making it the main focus of the photo. Not all photos have to have clutter free backgrounds, I quite like the clutter, BUT not if it’s distracting from the subject. Whether you use auto or manual focus, make sure the subject is very clearly in focus.

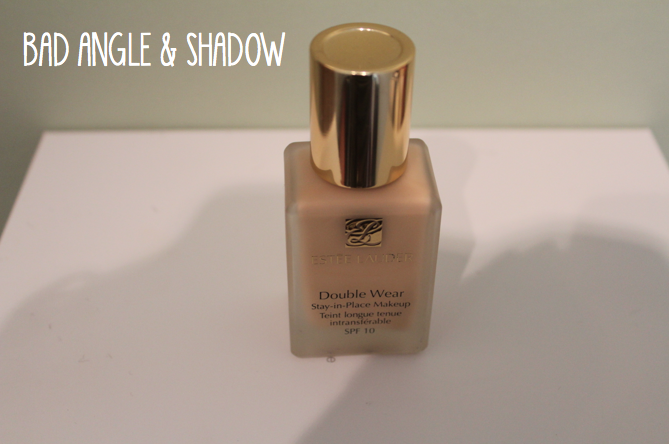
Try and show the true sizing of the subject and this can be done by the angle you take the photo. If you take it from above you can dwarf the subject, so I recommend bending down to it’s level and taking the photo straight on.
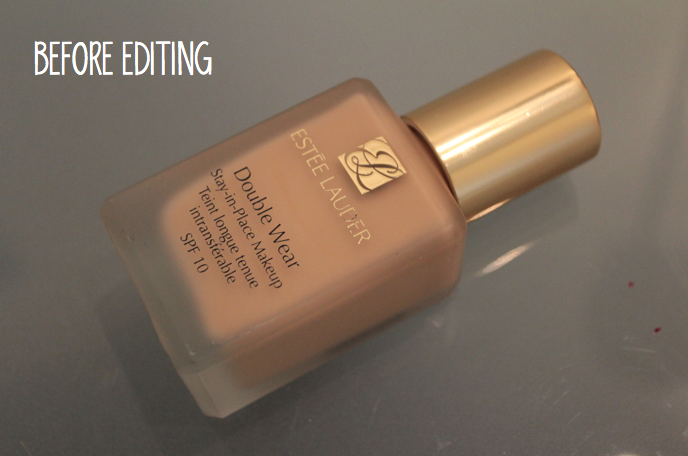
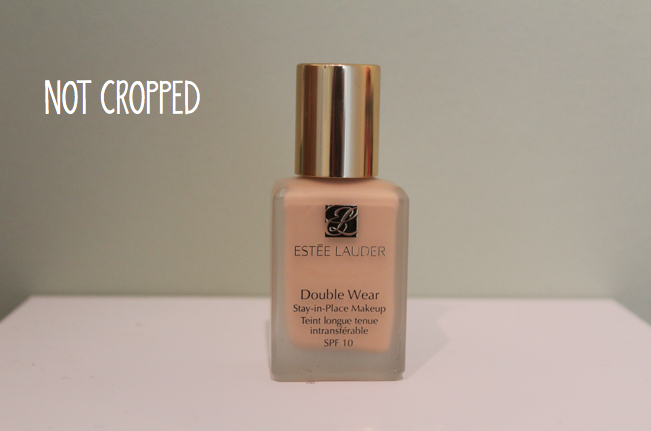
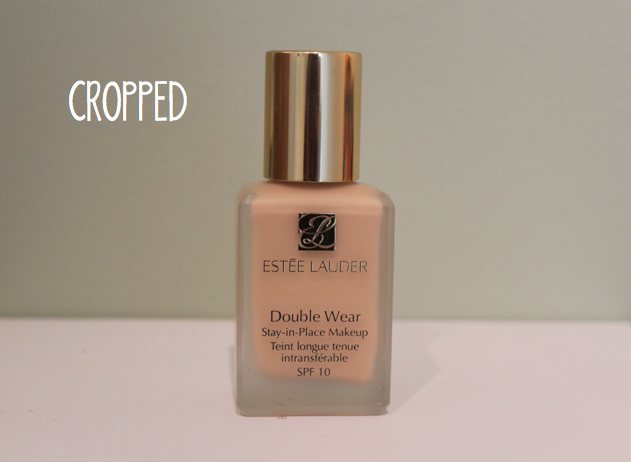
Editing
I’m not a massive ‘editor’, if I do edit a photo I simply make it brighter using ‘exposure’ on iPhoto or I crop it. Sometimes I have to make it a bit straighter too, but I think it’s good to teach yourself to take photos that don’t need editing. Not for any particular reason, but I think sometimes photos can get over edited so when I take photos I try to get the finished product if I can. If you need to, you can edit using lots of different programmes including iPhoto, Photoshop and Pixlr. I used to edit the colour of my photos using ‘Toycamera’, but I don’t tend to do that as much anymore.

So that’s pretty much it. I knew it would be a short post 😉
Things are quite different when taking outfit photos, especially outside, but if you understand the basics then just play around and you’ll find what works. One last thing that I think is quite important is to make your photos large on your blog. Of course not all blogs want the main focus to be the photos, but I’ve seen so many blogs that have lovely photos but they’re so small you can hardly see them. If you go to all the effort of taking them, show them off and make them BIG. It’s all about the little details.
I’m sure I missed some stuff out that I wanted to mention, but if you have any questions head over to my Facebook page and write on the wall or tweet me @lilypebbles.
Let me know if you like this kind of post and maybe there are some other topics I can cover in the future.
Thanks for reading!
Lily xx